

You're probably dealing with one of two situations right now. Either a contractor has told you the roof needs anchor points before anyone can service plant, gutters, skylights or sheeting, or you've inherited an older site where anchors are already on the roof and nobody can produce a proper compliance file for them.
That's common across Sydney warehouses, factories and strata blocks. The metal is there. The tags might even be there. What's often missing is the proof that the system was designed for that roof, installed into the right structural member, certified properly, and handed over with a maintenance trail that will stand up later.
After two decades on commercial roofs, I can say this plainly. Roof anchor point installation is rarely let down by the visible hardware alone. It's let down by bad assumptions, weak load paths, and poor paperwork. If you manage a building, that gap becomes your problem the moment someone clips on.
Table of Contents
- Why Roof Anchor Points Are More Than Just Fittings
- Navigating Australian Standards for Commercial Anchors
- Step-by-Step Roof Anchor Installation Workflow
- Comparing Fall-Arrest, Work-Positioning, and Travel Restraint
- Proof Testing, Certification, and Documentation
- Maintenance and Handover Checklists for Strata and Owners
Why Roof Anchor Points Are More Than Just Fittings
A contractor turns up to service rooftop plant on a Sydney factory. There are shiny anchors on the sheet roof, each one tagged, each one looking the part. Then the access plan gets reviewed and the problems start. The travel path forces the worker across a fragile section, the anchor layout creates swing-fall exposure near the edge, and nobody on site can produce the install detail, test record, or handover pack. The fittings are there. The proof is not.
That gap is where a lot of commercial sites get caught, especially now that owners and strata managers are being asked harder questions about evidence, not just hardware. An anchor point only has value if it suits the task, ties back to the structure properly, and comes with records that show what was installed, where, why, and under whose certification.
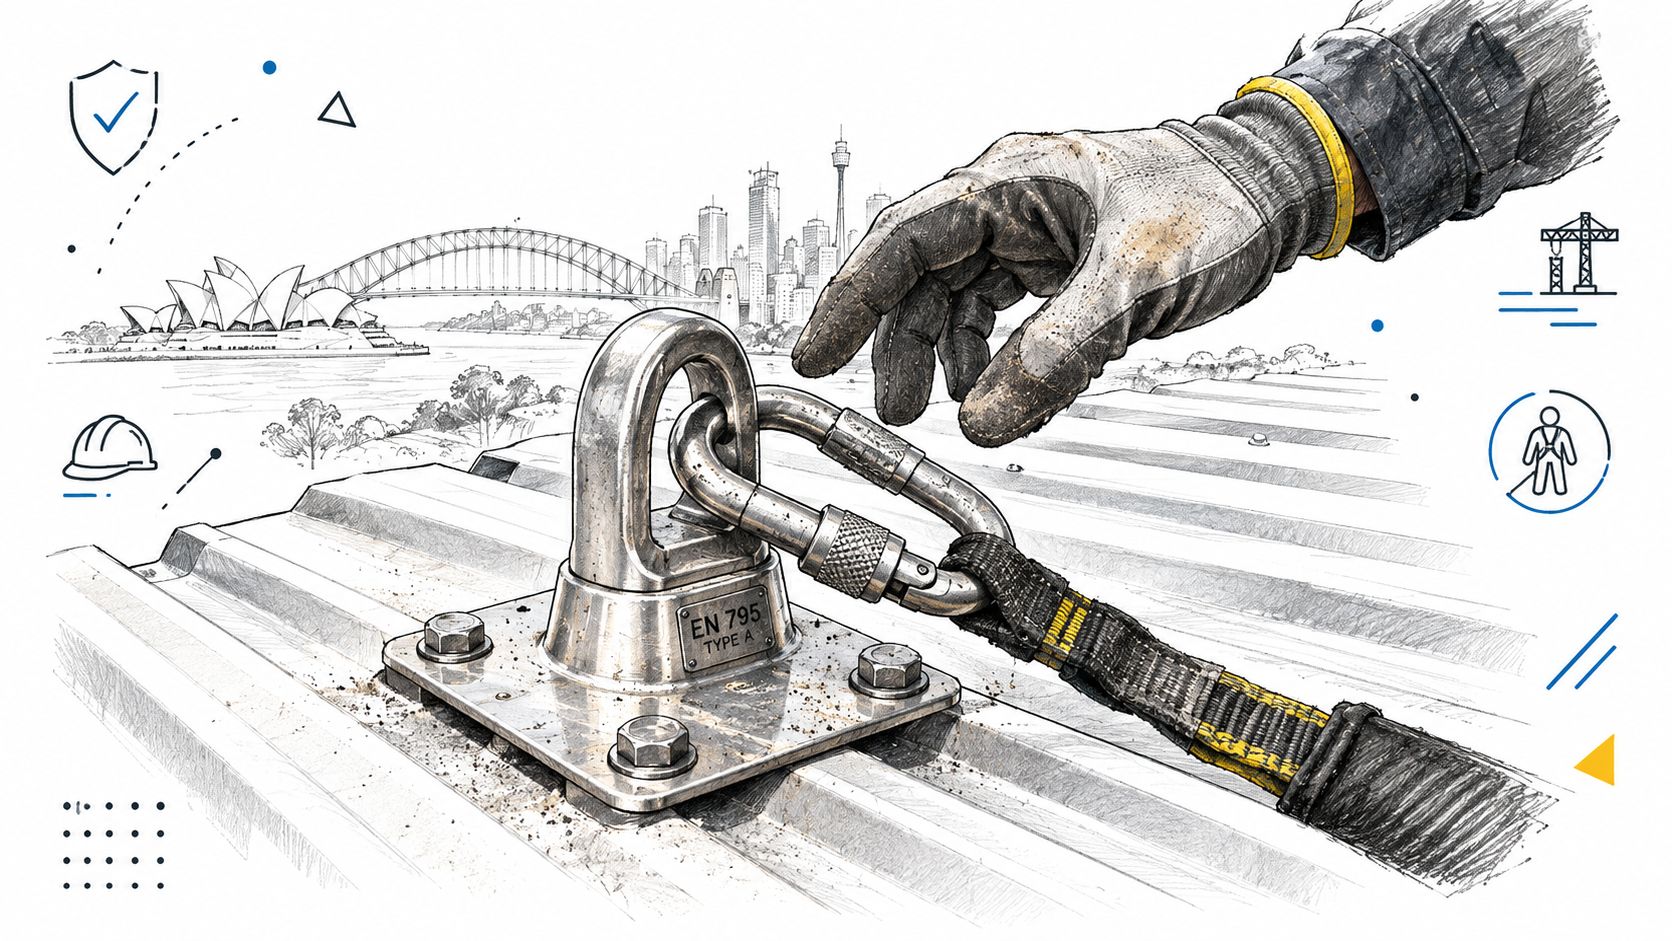
What goes wrong on real roofs
The weak jobs usually start with the wrong question. People ask where they can fit an anchor, not how the person will move across the roof or what member will carry the load in a fall.
On warehouses, factories, and strata buildings, that mistake shows up in predictable ways. Anchors get fixed into a location that is convenient to install but awkward to use. The worker has to unclip too often, step around services, or drift too close to an edge just to reach the work area. I see this a lot on roofs where access was treated as a product selection exercise instead of a system design exercise.
Load path is the other failure point that gets missed. The top sheet is only the surface. Inspection does not stop at a neat-looking bracket and a tag. The question is whether the force transfers into purlins, rafters, concrete, or other structural elements that can carry it, and whether that detail was checked rather than assumed.
A tidy install can still be a bad install.
What a proper anchor system includes
A roof anchor point is one component in a working height-safety setup. On a commercial roof, that setup has to cover more than the metal fitting:
- the task being done
- the path the worker takes
- the roof material and condition
- the structural fixing detail
- the intended system use, whether restraint, positioning, or arrest
- clearance and swing-fall limits
- rescue planning
- certification, drawings, tags, and maintenance records
That last item is where many asset owners are exposed. Plenty of older Sydney sites have anchors with no clear paper trail, or with paperwork that proves a product was bought but not that the installed system matches the roof it sits on. Under the current standards shift, that distinction matters. Facility managers need evidence that survives turnover of contractors, committee members, and building staff. If the file only says "anchors installed", it is thin. If it includes layout, fixing methodology, product identification, inspection intervals, and sign-off records, it is far easier to defend.
What passes inspection versus what lasts
Some installations scrape through a visual check because the hardware appears serviceable and the tags are current. That is not the same as a well-resolved system. The jobs that hold up over time are the ones where the installer considered future access, maintenance frequency, worker behaviour, and the owner's need to prove compliance years later.
The practical rule is simple. If nobody can show how the anchor selection, fixing method, and access pattern were documented at handover, the site owner is relying on assumptions. On a live asset, assumptions are what fail first.
Navigating Australian Standards for Commercial Anchors
A Sydney strata manager gets handed a fresh tag on an anchor, a one-page invoice, and a verbal assurance that the roof is compliant. Six months later, a new contractor asks for the design basis, fixing detail, proof of substrate suitability, and inspection records. That is where commercial sites get exposed. The metal may be on the roof, but the compliance file is often too thin to survive scrutiny.
For commercial and industrial roofs, the standards do different jobs, and confusion starts when owners treat them as one package. AS/NZS 1891.4:2009 deals with selection, use and maintenance of industrial fall protection systems. AS/NZS 5532, including the current shift from the 2013 edition to the 2025 edition, deals with single-point anchor devices and how they are tested, classified and certified. If you need the broader framework around how these documents sit inside the Australian roofing field, this summary of Australian roofing standards is a useful reference point.
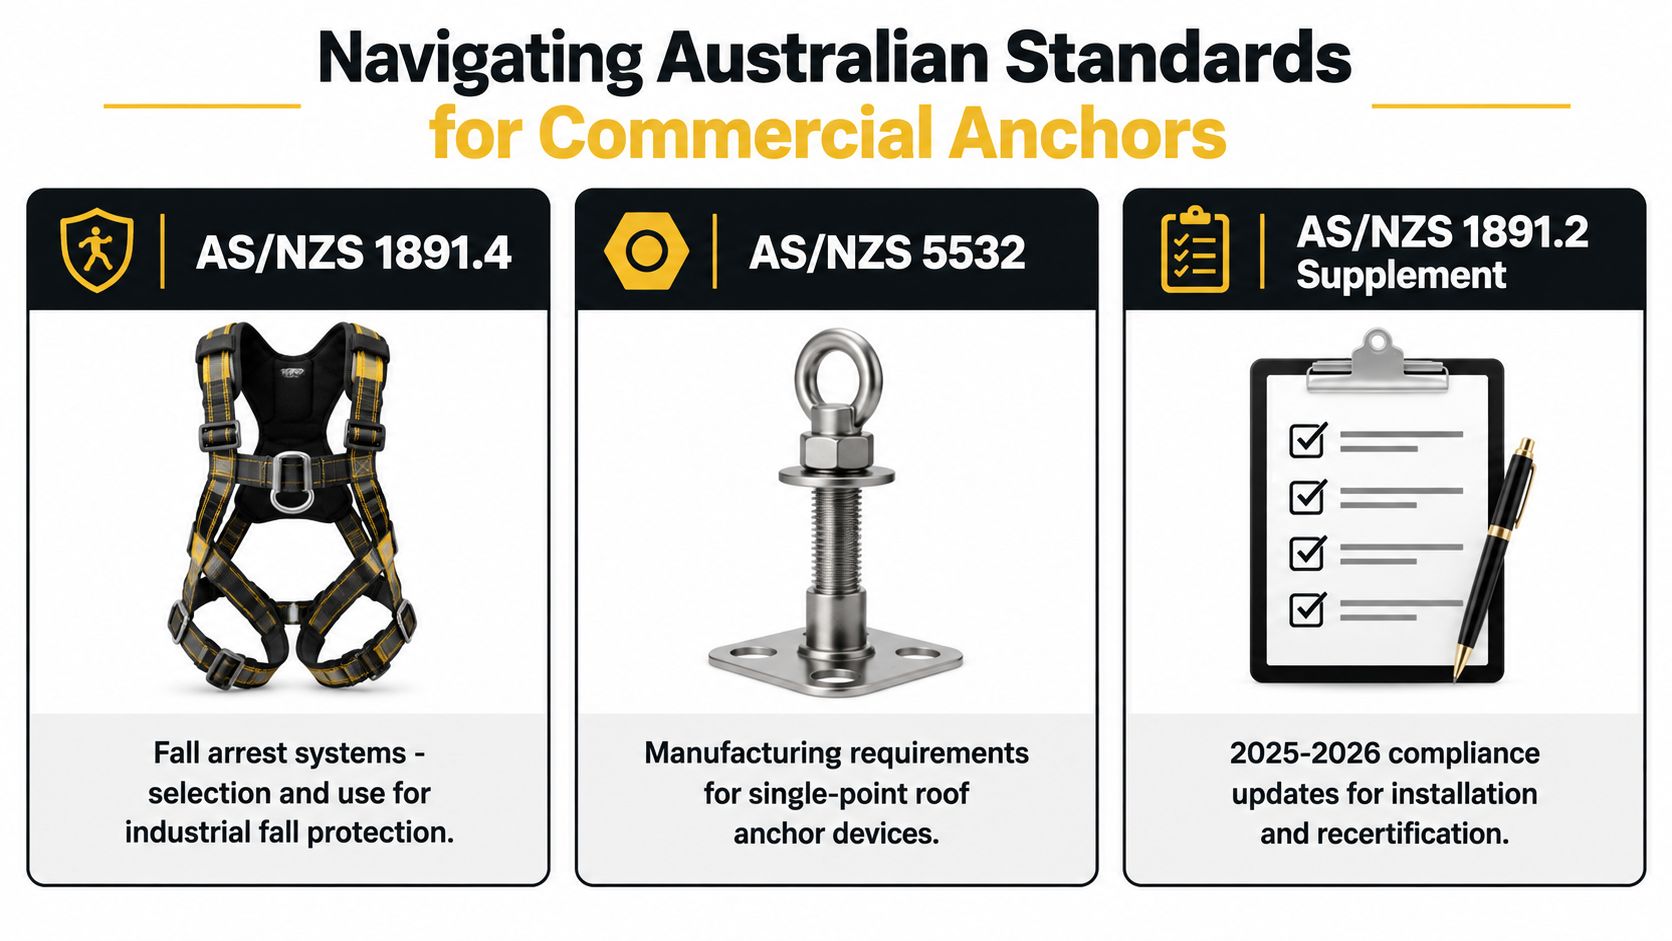
What each standard actually covers
On site, I see the same mistake again and again. A product certificate gets treated as if it proves the installed system is compliant. It does not. A certified anchor can still fail a job if it has been fixed into corroded deck, thin sheeting, the wrong batten zone, or structure that was never checked.
| Standard | Main role | What it doesn't solve by itself |
|---|---|---|
| AS/NZS 1891.4:2009 | Selection, use and maintenance of fall protection systems | It does not replace the anchor manufacturer's installation method or project-specific design checks |
| AS/NZS 5532:2013 and 2025 | Product requirements for single-point anchor devices | It does not prove the roof build-up at your site is suitable for that anchor |
| SafeWork NSW guidance | Practical duty-holder guidance for secure attachment points and safe use | It still relies on the relevant standards, competent installation, and documented inspection regimes |
That split matters more under the 2025 to 2026 standards shift. Owners now need to ask for evidence across the asset life cycle, not just evidence that a compliant product was purchased. On a warehouse or strata roof, the file should show what anchor was used, what substrate it was fixed to, what fixing pattern was approved, who signed off the installation, what inspection interval applies, and how future contractors can identify the system years later.
The load rating people quote without understanding
The load figure gets repeated constantly in this trade, usually without any discussion of the roof underneath it. A rated anchor is only part of the system. The structure carrying that anchor has to suit the intended use as installed.
That means checking the support member, fixing layout, edge distances, corrosion, existing penetrations, and any deterioration from age or water entry. I have seen anchors on older factories that looked acceptable from above and were one rusted purlin away from a failed inspection once the sheets came off. Tags do not fix bad structure. Product literature does not fix a poor fixing zone.
A rated anchor fixed into the wrong part of the roof is still a failed installation.
What changed in the standards shift
The practical shift is traceability. Older jobs often have enough paperwork to show an anchor exists. They do not always show why that anchor was suitable for that roof, whether the installer followed the tested method, or what ongoing inspection and recertification path applies.
That is the documentation gap many Sydney owners need to close now. For strata committees and facility managers, the right question is no longer whether someone can install an anchor. The right question is whether the contractor can hand over a record set that proves compliance from installation through inspection, maintenance, and future recertification.
That standard is harder to fake, and it is easier to defend when auditors, certifiers, insurers, or a new maintenance contractor start asking for the file.
Step-by-Step Roof Anchor Installation Workflow
A warehouse owner calls after a failed access audit. The anchors are on the roof, the tags are hanging, and nobody can produce a clear file showing what the anchors are fixed into, why those positions were chosen, or what needs to happen at the next inspection. That is common on Sydney commercial sites. The steel is often the easy part. The paperwork trail is where jobs fall apart years later.
On warehouses, factories, and strata buildings, I treat anchor installation as two jobs done together. One is physical installation. The other is creating enough evidence that the owner, the next contractor, and an auditor can all see what was installed and why. If you want the wider project context before height safety is added, this guide to commercial roof installation planning is a useful starting point.
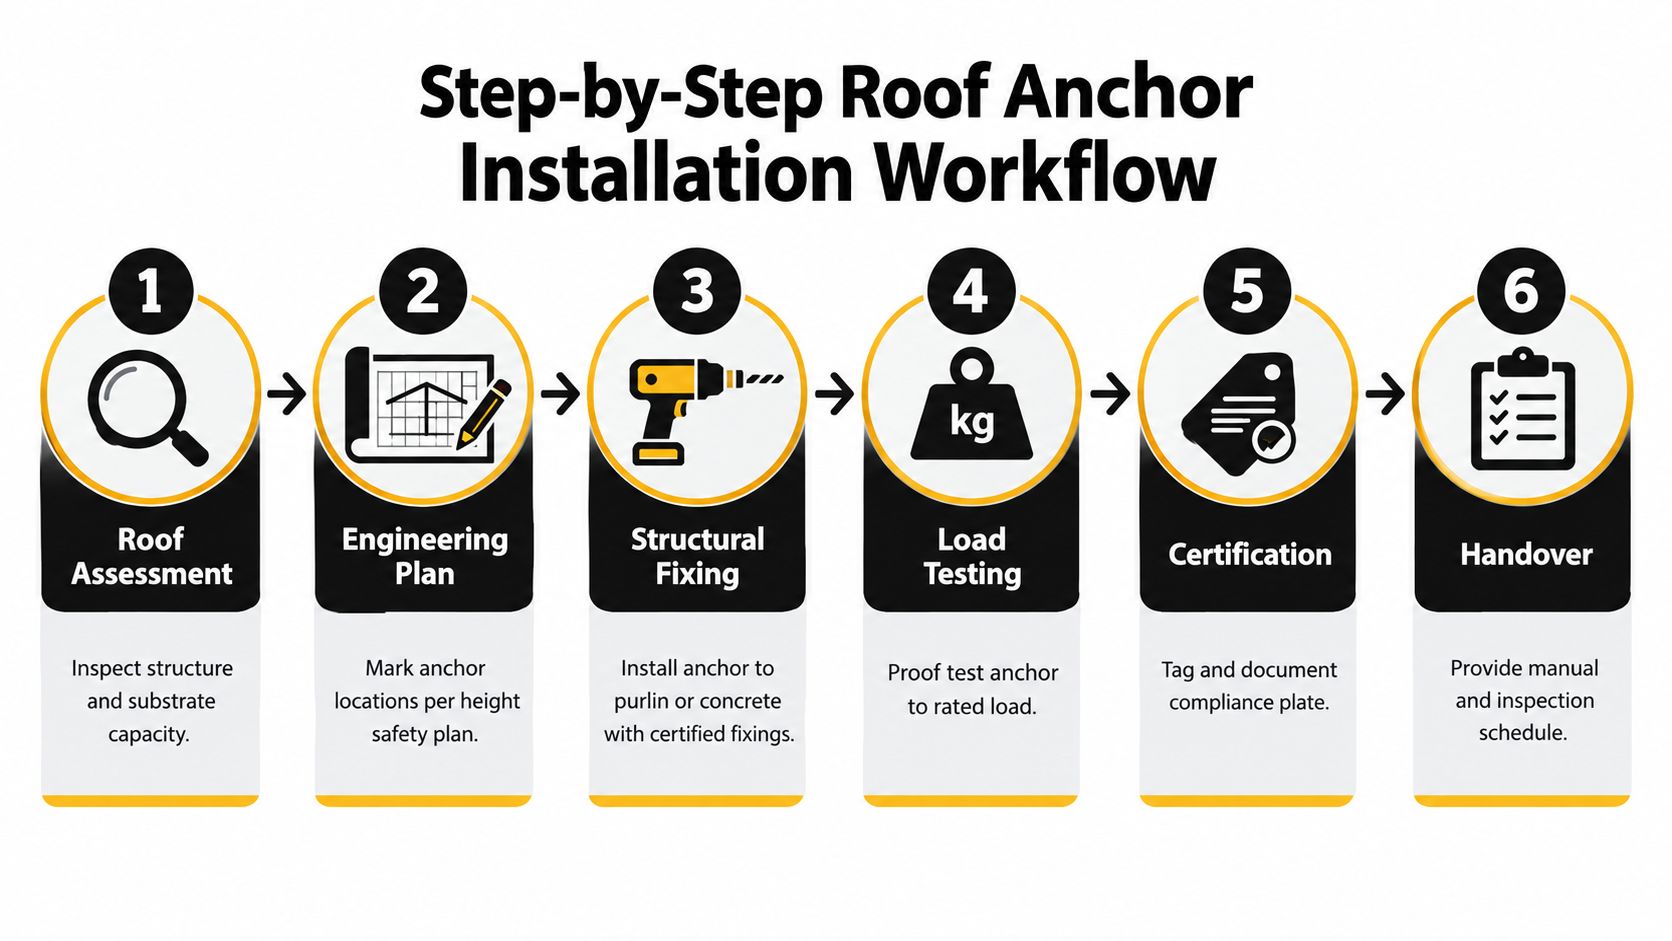
Step 1 through Step 3 on the roof
Confirm the roof build-up and condition
Start with the actual roof assembly, not the product brochure. Metal deck, concrete, membrane, insulated panel, and tile-over-frame systems all need different fixing methods and different checks. The top surface can look serviceable while the supporting area below has corrosion, water damage, patch repairs, or old penetrations that make that location unsuitable.Set anchor positions from the task, not the roof plan
Good set-out follows how people will move during maintenance, cleaning, plant service, or repair work. I have seen tidy, evenly spaced anchor layouts that looked fine on the drawing and created poor access in service because the user had to step around ducts, stretch past conduits, or work too close to an edge. Practical set-out beats visual symmetry every time.Check the load path into a suitable structural member
Weak jobs usually show themselves here. The anchor has to transfer load into a member that is capable of carrying it in the roof's current condition. Thin sheet, damaged timber, corroded purlins, and built-up packers do not become acceptable because a rated fitting is bolted on top. If the structure is doubtful, stop and verify before any holes are drilled.
For a visual walk-through of how installers sequence the work on site, this clip is useful:
Step 4 through Step 6 that separate good jobs from weak ones
Once the set-out and structure are confirmed, the installation itself has to stay disciplined.
- Match the anchor to the substrate and the intended use: Steel purlin anchors, concrete anchors, and other proprietary systems are not interchangeable. The right choice depends on the structure below, the duty required, and the approved fixing method.
- Install to the tested pattern without site improvisation: Hole size, fastener grade, spacing, sealing, isolation between dissimilar metals, and substrate thickness all affect performance. The jobs that barely survive inspection usually include an "equivalent" fixing, a shifted position, or a skipped sealing detail.
- Record evidence while the roof is open: Take photos of the supporting member, fixings, substrate condition, and finished installation. Mark the anchor ID and location against a roof plan before the area is covered or access changes.
- Prepare the handover file before leaving site: The file should show what was installed, where it sits, what it is fixed to, the installation date, product details, inspection requirements, and any usage limits. For strata managers and facility teams, that file is what proves the system can be maintained and recertified properly.
What works and what doesn't
The field mistake I see most often is simple. Someone treats the anchor like a piece of hardware instead of part of a controlled height safety system with a traceable installation record.
Here's the trade-off in plain terms:
| Works in practice | Barely survives inspection |
|---|---|
| Anchor locations based on movement, clearance and structure | Anchor locations based on convenience |
| Fixing into verified structural members | Fixing into whatever is easiest to reach |
| Manufacturer pattern followed exactly | Substituted fixings or altered spacing |
| Photos, layout plan, product details and inspection record handed over | Tag on the roof with no supporting file |
On-site advice: Ask the installer to show the load path, the fixing method, and the handover documents before sign-off. If any one of those is vague, the owner inherits the problem.
One option used on some metal roof replacement projects is Commercial Roofers' certified anchor point and OH&S-compliant height safety system installation, where anchor works are coordinated with the roofing scope so the structural fixing, weatherproofing, and handover records align. That is not the only workable model, but it does reduce clashes between trades when the roof is already open.
Comparing Fall-Arrest, Work-Positioning, and Travel Restraint
Most owners don't need more anchor points. They need the right anchor application for the task. That's a different decision.
On Sydney commercial roofs, I often see fall-arrest specified where travel restraint would have been cleaner, easier to supervise, and simpler for the end user. I also see work-positioning misunderstood as if it can replace fall-arrest in every situation. It can't.
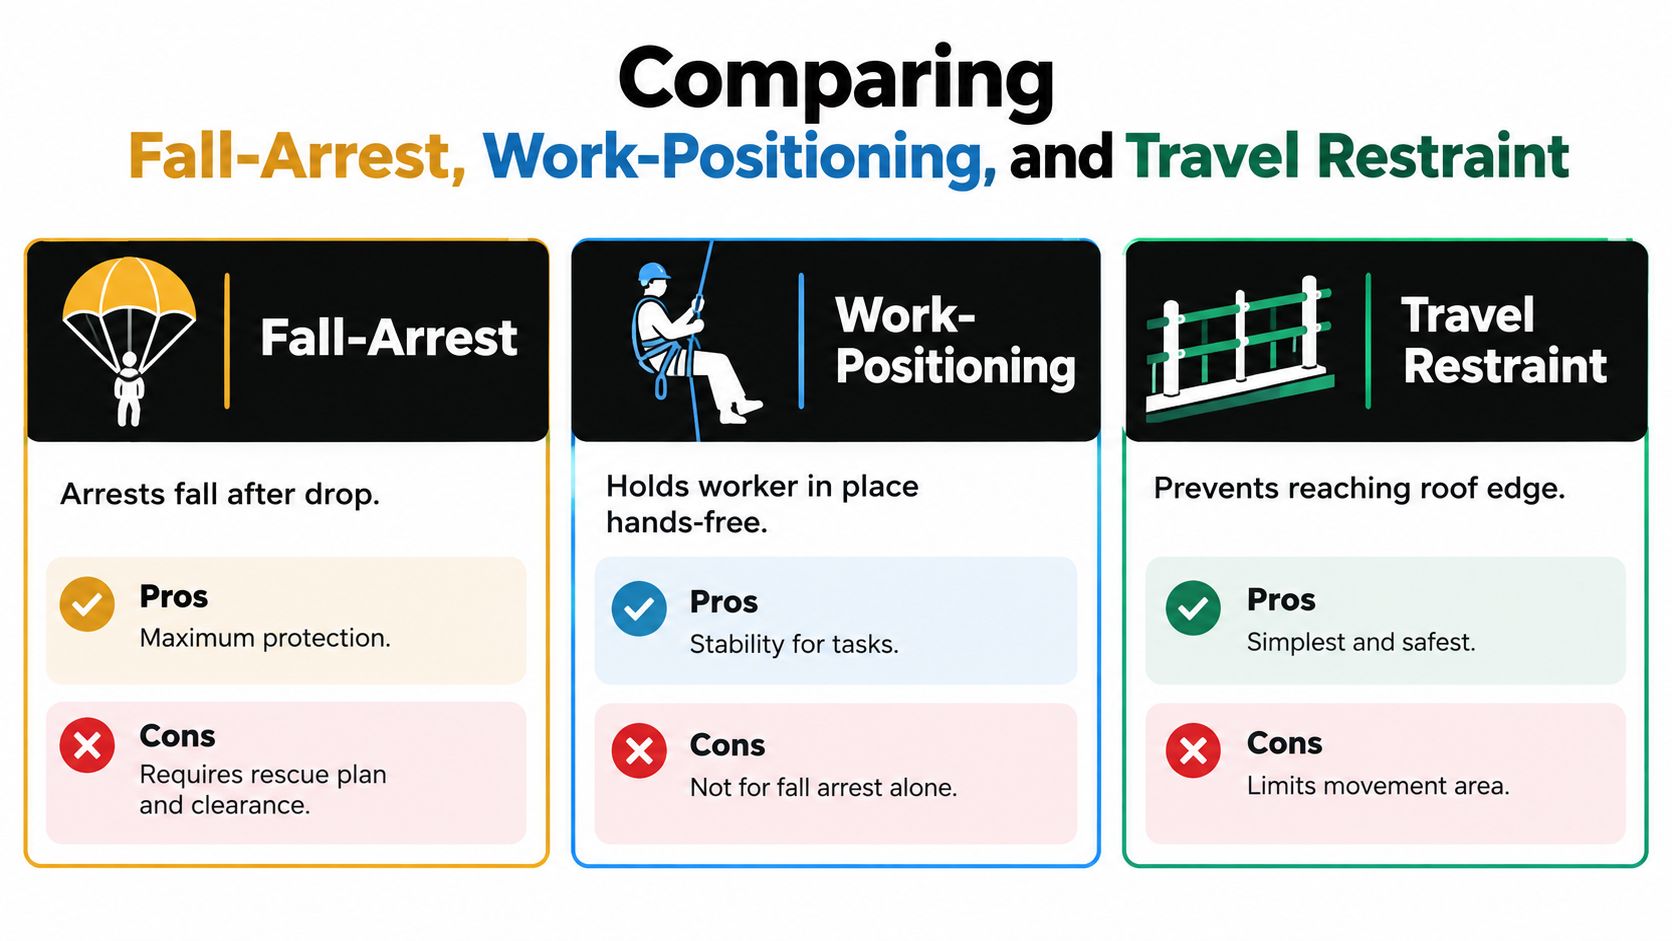
Fall-arrest when the worker can reach a fall edge
Fall-arrest systems are built to stop a fall after it starts. That makes them necessary on many roofs, but they also bring the toughest consequences for design. Clearance, pendulum effect, rescue planning and user training all become sharper issues.
Choose fall-arrest when:
- The task requires edge access: Sheet replacement, façade interface work and some plant servicing do.
- Movement can't be fully restrained: The worker needs reach beyond a no-go line.
- The roof layout leaves no safer alternative: Some structures force arrest-based access.
The mistake is using arrest by default. It protects against a severe event, but it also accepts that the worker may enter a fall zone.
Work-positioning for controlled hands-free access
Work-positioning holds the worker where the job happens. It suits tasks on steep surfaces or locations where the user needs stable, hands-free support while remaining controlled by the system.
This method can work well for specialist maintenance, but only when it is designed properly and paired with the right overall safety arrangement. It is not just “an anchor plus a rope”. It depends on how the user is supported, how movement is limited, and what backup measures apply.
Work-positioning is for holding a worker in place. It is not a shortcut around proper fall protection design.
Travel restraint for routine roof access
Travel restraint is usually the cleanest answer for routine roof work because it prevents the worker from physically reaching the fall edge in the first place. For many strata roofs, warehouses and plant decks, that's the method I'd rather see adopted where the roof geometry allows it.
A simple comparison helps:
| System | Best suited to | Main trade-off |
|---|---|---|
| Fall-arrest | Jobs where edge exposure can't be avoided | Higher consequence design and rescue planning |
| Work-positioning | Tasks requiring stable supported access at the work face | Must not be treated as a stand-alone substitute for all fall risks |
| Travel restraint | Routine access where workers can be kept away from edges | Movement area is intentionally limited |
If you manage a site with regular maintenance visitors, restraint often gives the clearest operational control. Users make fewer risky decisions because the system removes the option of getting too close to the edge. That's usually easier to manage than relying on everyone to judge arrest zones perfectly every time.
Proof Testing, Certification, and Documentation
A roof leak contractor turns up after a storm, clips onto an anchor near the plant deck, and asks the building manager for the certification file. The tag is there. The invoice is there. The evidence that proves what was installed, what it was fixed into, and whether it was tested properly is missing.
I see that problem on Sydney strata and industrial sites all the time. The metal is on the roof, but the paper trail is weak. Under the 2025 to 2026 standards shift, that gap matters more because owners, managers, and inspectors are asking harder questions about traceability, substrate suitability, proof testing, and who signed off the installation.
Installed anchors still fail the paperwork test
An anchor can be physically fitted and still leave the owner exposed.
The usual handover wording is too loose. “Installed to standard” does not tell you which device was used, what roof build-up sat underneath it, whether the fixing layout matched the manufacturer's instructions, or whether proof testing applied. On an older warehouse roof with patch repairs, over-sheeting, or mixed substrates, those details are the difference between a file that stands up and one that falls apart in an audit or after an incident.
For each anchor or anchor group, the record should answer six plain questions:
- Which anchor device was installed
- Where it was installed
- What substrate or structural element it was fixed to
- What installation method and fixing pattern were used
- Whether proof testing was required, and the result
- Who certified it, and when it must be reinspected
If those points are missing, the owner is relying on assumptions.
What the handover pack needs to contain
For strata managers, factory owners, and facility teams, I would expect the close-out file to include records that can be checked years later by someone who was not on the original job.
| Document or record | What it proves |
|---|---|
| Anchor register or marked roof plan | Identifies each anchor location and reference number |
| Product data and manufacturer instructions | Shows the approved device, substrate conditions, and fixing method |
| Installation record | Confirms what was actually installed on that roof, not what was quoted |
| Compliance certification | Shows who signed off the work and on what basis |
| Proof-test records where applicable | Confirms the anchor was verified, not just sighted from the roof surface |
| Inspection schedule | Sets the dates or intervals for future reinspection |
Good documentation also makes later roof work easier to control. If you want a practical benchmark for record quality, this commercial roof inspection report template for building files shows the level of location detail, condition notes, and traceability that owners should expect.
Owner's checkpoint: Get the full handover pack before releasing final payment. Chasing it six months later usually means missing attachments, vague answers, and a site team that has already moved on.
What passes on paper, and what holds up in the real world
Some files scrape through because they contain a certificate and a few photos. That may satisfy a quick glance. It rarely satisfies a serious review.
The weak jobs usually show the same faults:
- Generic certification language with no clear link to anchor locations or roof areas
- No substrate detail on metal deck, concrete, timber, or supporting steel
- Missing manufacturer requirements for the actual product used
- No test record where the installation basis calls for one
- No revision trail after rectification, roof replacement, membrane works, or service penetrations nearby
The better jobs read like asset records. Each anchor is identifiable. Variations are written down. Test results, if required, can be matched back to the specific point. A future inspector can open the file and understand what they are looking at without guessing.
That is the standard worth paying for. A tag on the roof might get a contractor started. The documentation is what proves the system can still be trusted across the life of the asset.
Maintenance and Handover Checklists for Strata and Owners
Once anchors are on the roof, the biggest risk is drift. Staff change. Contractors change. Reports get buried in inboxes. A system that was compliant on handover becomes hard to verify a few years later because nobody maintained the file.
Strata managers and facility owners should treat anchor records like any other essential building compliance asset. Keep them central, current and easy to retrieve.
What should stay in the building file
At handover, ask for a package that includes:
- Anchor identification records: A roof plan or register showing where each point sits and what it is intended for.
- Manufacturer and certification documents: Product details, installation basis and compliance sign-off.
- Inspection schedule: Clear future dates or intervals for reinspection under the site's maintenance regime.
- Use limitations: Any restrictions on user type, access zone, substrate condition or connected equipment.
- Repair history: Notes on any modifications, corrosion treatment, roof replacement works or adjacent changes that could affect the system.
What owners should check over time
During the asset life cycle, keep an eye on practical issues, not just paperwork:
- Roof condition changes: Corrosion, leaks, membrane failure, movement or structural deterioration near anchor locations.
- Unauthorised alterations: Added services, new penetrations, solar works or plant upgrades around the anchor zone.
- Tag and record mismatch: Labels on the roof should match the compliance file.
- Contractor feedback: If maintenance crews avoid using an anchor because access feels awkward, investigate why.
Keep one live compliance file for the roof, not separate bits of paper spread across strata managers, contractors and old email chains.
When the roof is repaired, recoated, re-sheeted or modified, review the anchor system as part of that work. Don't assume the old layout still suits the new roof condition or access pattern.
Commercial Roofers handles commercial roof work across Sydney, including projects where anchor points and height safety need to be coordinated with repairs, replacement or access planning. If you need a practical review of an existing roof system, a new installation tied to roofing works, or help sorting out the documentation gap, visit Commercial Roofers .