

A commercial facade can look perfect when the scaffold comes down, the colour is even, and every visible screw appears neatly placed. Then the first heavy rain finds a poorly detailed flashing, condensation sits behind the sheets, or loose swarf leaves rust marks along the lower edge. By the time someone sees the stain inside the building, the cladding has already concealed the issue.
This Colorbond® cladding installation guide focuses on what remains correct after the building is sealed. Panel alignment and appearance matter, but long-term performance depends just as much on thermal movement, cavity drainage, membrane selection, compatible fixings and disciplined cleanup. The guidance below is aimed at warehouses, factories, retail buildings and other commercial projects across Sydney and NSW.
Table of Contents
- Why Commercial Colorbond Cladding Fails Before It Even Looks Finished
- Material Grades, Fasteners, and Compliance Standards You Must Check
- Preparation, Framing Alignment, and Panel Sequencing on Site
- Cavities, Membranes, and Flashings That Keep Walls Dry
- Inspection, Maintenance, and Long-Term Cladding Performance
- Planning a Commercial Cladding Project the Right Way
Why Commercial Colorbond Cladding Fails Before It Even Looks Finished
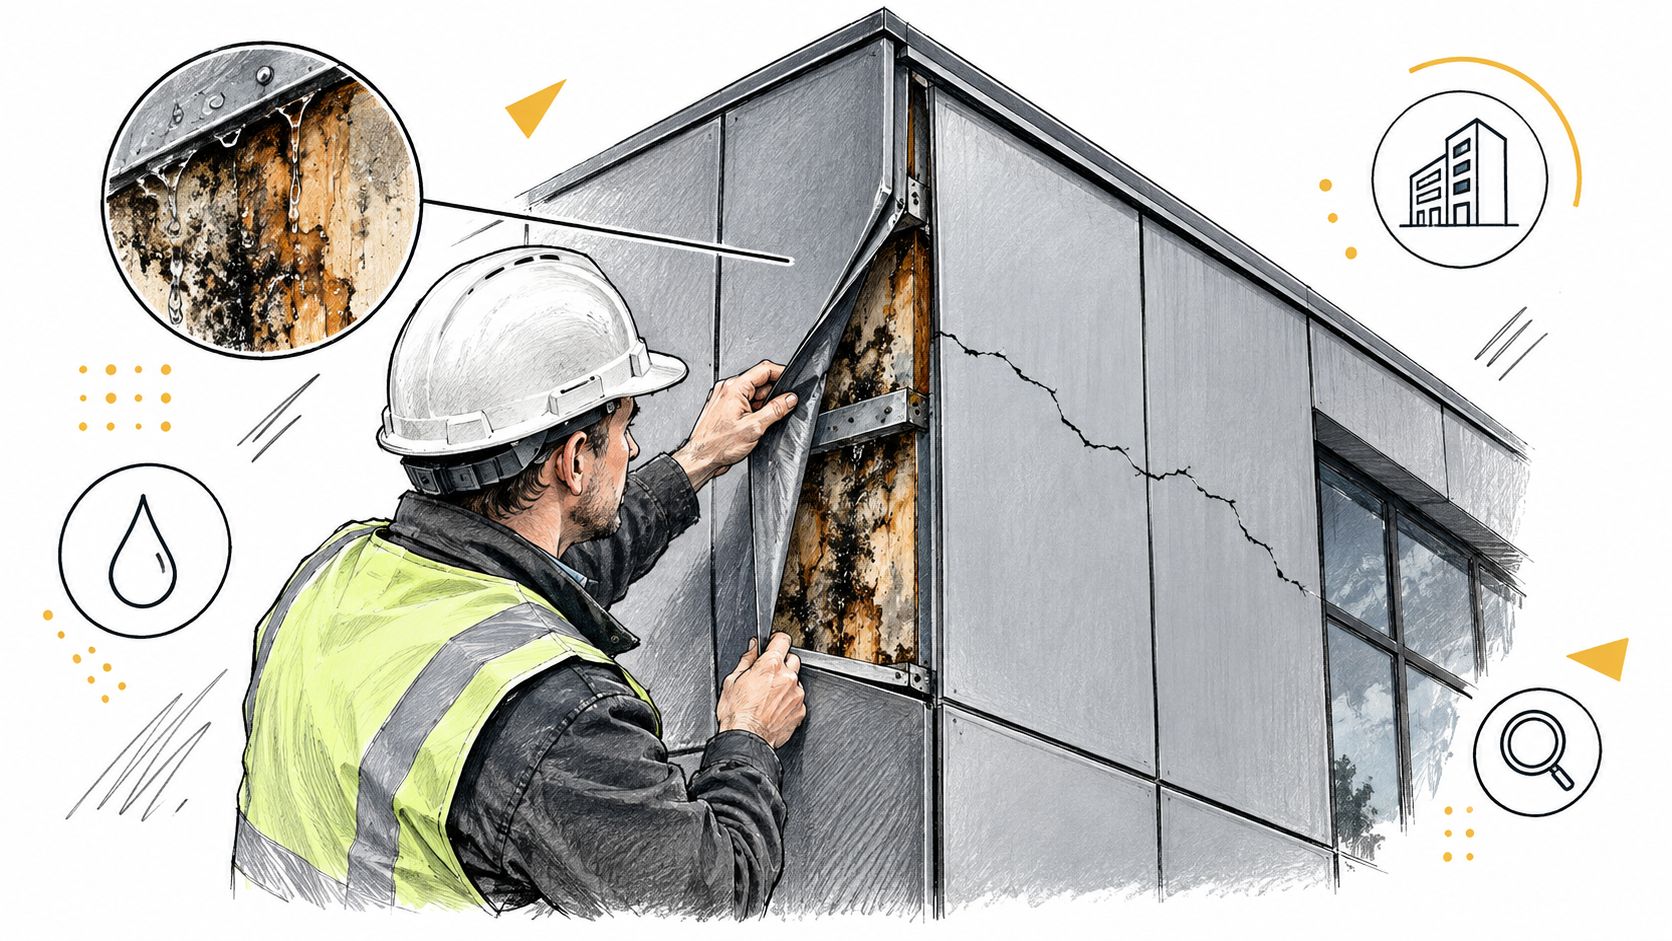
A warehouse facade can pass handover with straight sheets, clean joints and an approved colour schedule, yet still be set up for failure. An uneven frame, obstructed cavity or rigid fixing can continue causing problems behind the finished surface. Once insulation, internal linings and services close the wall, those defects become expensive to inspect and repair.
COLORBOND® steel has a long Australian installation history. The first coil rolled off the Number 1 coil painting line at Port Kembla in 1966, where the product was also invented. An industry source reports roughly 6 million tonnes produced since then, while the original 6-colour range has grown to 22 colours (Housing Industry Association background on COLORBOND® steel). That history provides a useful local benchmark. It cannot correct poor framing, restricted movement or water trapped behind a panel.
The defects hidden behind a finished wall
Check the substrate before checking the sheets. Framing members must remain aligned, plumb and capable of providing a consistent fixing plane. Wandering studs or girts send each panel along a slightly different line. Over long runs, lower edges begin to fan out, joints lose consistency and installers are forced to pull sheets into position.
Thermal movement requires the same attention. Metal cladding expands and contracts with temperature, while the frame can deflect under wind and imposed loads. Australian guidance requires wall cladding to follow AS 1562.1:2018, remain firmly fixed to framing, resist wind actions, stay isolated from building loads and retain room for thermal movement. A neat screw pattern can still lock a panel in the wrong place.
Practical rule: If the frame is out of line, stop before fixing the first sheet. Establish the datum and correct the substrate instead of forcing the cladding to hide the error.
Moisture control depends on the concealed layers. Incidental water needs a clear route through the cavity, with membranes and flashings lapped so water moves outward rather than into the wall. Blocked drainage paths can leave moisture sitting behind sheets while the facade still appears intact.
Swarf creates another avoidable failure. Drilling and cutting leave steel fragments on ledges, flashings and the base of the wall. If they remain in place, moisture can produce staining and local corrosion. Sweep, vacuum and inspect the work area before each section is closed.
Broader facade comparisons, including resources that find wood post cladding at XTREME EDEALS, do not replace project-specific detailing. Record the frame condition, cavity layout, flashings, penetrations and future inspection access before the first sheet is installed. The finished wall must continue to drain, move and dry after handover, not merely look correct on installation day.
Material Grades, Fasteners, and Compliance Standards You Must Check
Specify the substrate, coating system, steel grade and fastener class before ordering COLORBOND® cladding. For this system, the schedule should identify AS 1397 substrate compliance, a minimum G550 steel grade, AZ150 coating and AS/NZS 2728 coating compliance. These requirements affect wind resistance, corrosion exposure and the evidence available during a building survey or warranty discussion.
What each requirement controls
- AS 1397 substrate compliance: This sets the steel substrate requirements beneath the finished coating. It gives the team a defined material standard instead of relying on the product name alone.
- G550 minimum steel grade: The grade forms part of the sheet's structural specification. Assess it with the profile, support spacing and wind-action design. It does not replace engineering.
- AZ150 coating: This designation forms part of the corrosion-resistance specification. It matters where moisture, salt, industrial contaminants or exposed cut edges could affect the finished system.
- AS/NZS 2728 compliance: This applies to the pre-finished metal coating system. Matching the colour does not demonstrate compliance with the required performance standard.
- Class 3 screws to AS 3566: Fasteners require their own specification. A screw can fit the driver and still be unsuitable for the exposure or durability requirement.
Australian guidance also connects installation with SA HB 39:2015, including underlays or building papers, penetrations, flashings, fasteners and pitch. The relevant self-supporting metal wall-cladding conditions remain governed by AS 1562.1:2018. Keep the project documents, engineering requirements and manufacturer instructions together. A supplier substitution should not remove a requirement from the approved schedule.
Match the screw to the exposure
Class 3 screws to AS 3566 are specified for this system. Verify the screw length, thread form, washer compatibility, fixing location and support material before installation. Overdriving can crush the washer or deform the sheet. Underdriving can leave a weak seal and a loose connection.
For a practical reference when checking a commercial order, review roofing screws for metal roof, then confirm the final selection against the approved cladding design and product instructions. The fastener only performs as intended when the crew installs it at the specified location without damaging the coating.
Thermal movement also belongs in the material review. Confirm that the selected profile, fixing arrangement and detailing allow the wall to move as specified. A screw schedule that ignores movement can create restrained sheets, distorted laps or stressed flashings after the facade experiences temperature changes.
A compliant material schedule should answer five questions before delivery:
- Which substrate and coating are specified?
- Does the sheet meet the required grade and coating standards?
- Which screw class and standard apply?
- How will wind-action requirements determine the fixing layout?
- Which details govern flashings, penetrations and thermal movement?
If any answer is “the installer will work it out on site”, the project is not ready for sheeting.
Preparation, Framing Alignment, and Panel Sequencing on Site
The smoothest cladding jobs begin with an empty wall and a patient supervisor. Sheets shouldn't be unwrapped until the frame, cavity, datum lines and delivery route have been checked. Once panels are cut or lifted into place, crews tend to protect the programme by adjusting metal around defects that should have been corrected earlier.
Build the sequence around the first sheet
Check the framing members for line, level and plumb. Use a laser, string line and straightedge across the intended fixing plane. Pay particular attention to corners, openings and long uninterrupted elevations, where a small error becomes obvious as the sheets accumulate.
The first sheet establishes the visual and water-shedding reference for the wall. Position it with the specified overhang, secure it without pulling the profile out of shape, and check the lower edge before placing the next sheet. Continue checking that edge as the run progresses. This repeated check prevents fanning, where the ends gradually drift instead of remaining in one controlled line.
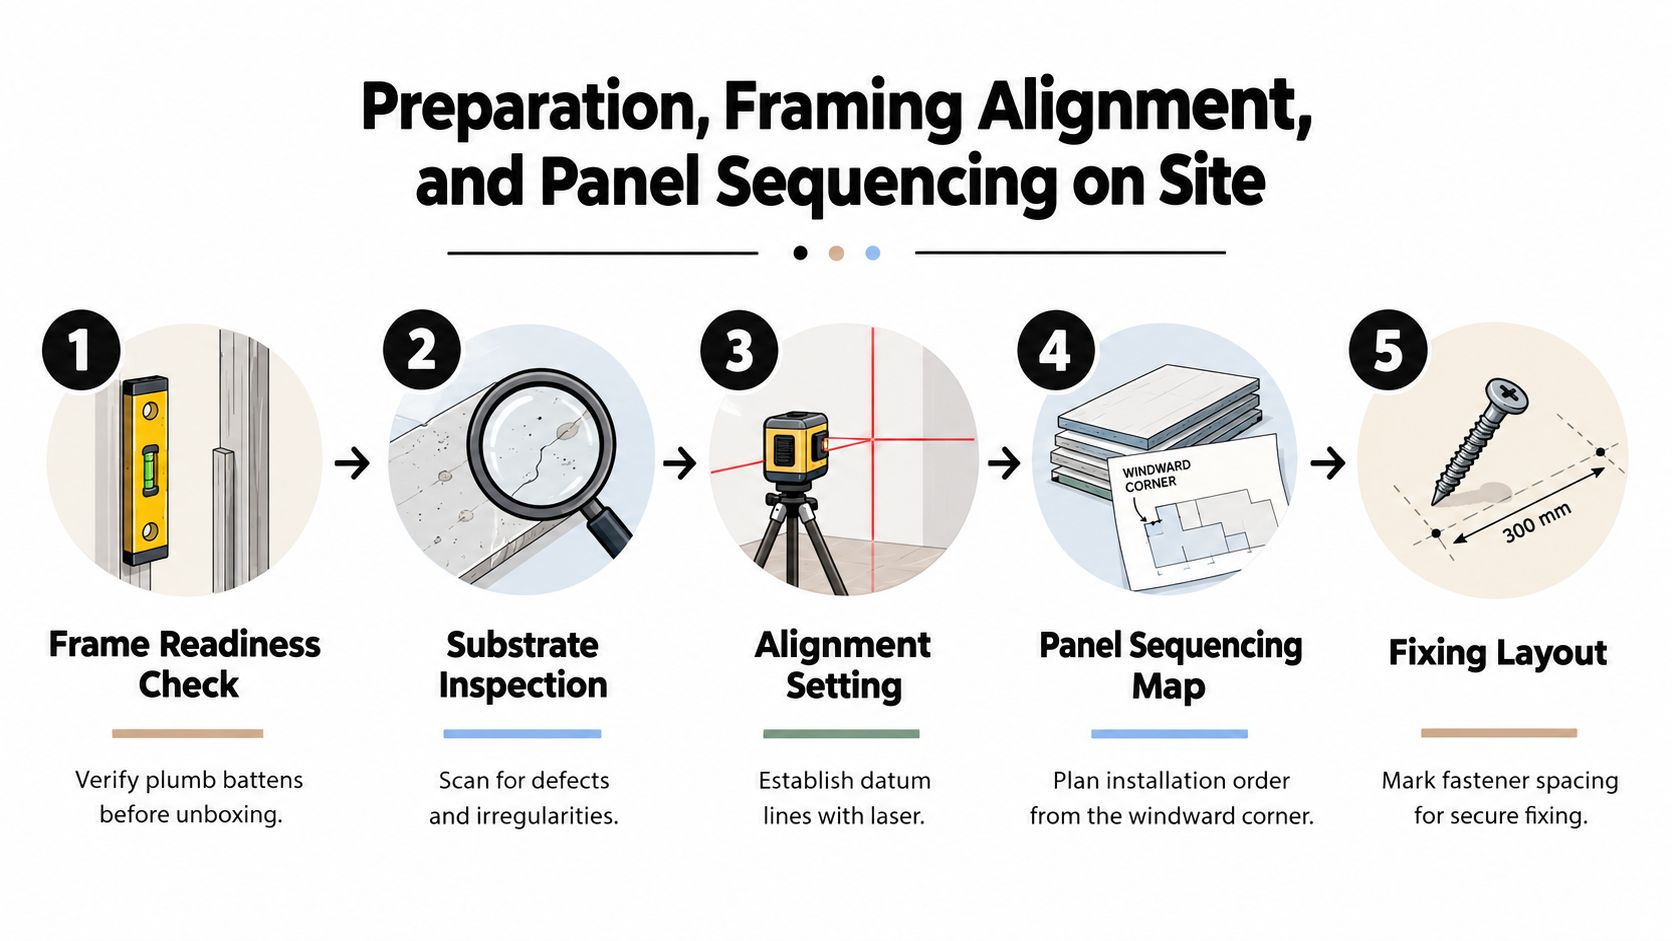
A useful site sequence is:
- Confirm frame readiness: Correct distorted or proud members before sheets arrive at the fixing face.
- Inspect the substrate: Check openings, corners, cavity battens, membranes and flashing zones.
- Set the datum: Establish a reliable line for the first sheet and verify it against the building geometry.
- Map the panel order: Organise sheets so the crew can maintain the intended lap and corner sequence.
- Mark the fixing layout: Transfer the approved fixing pattern without improvising around visible obstructions.
Manage long runs rather than forcing them straight
Long commercial walls expose poor sequencing quickly. If the first panel is out of square, later sheets may need excessive force to meet the corner or opening. That pressure can distort laps, damage coating surfaces and create uneven stress around fixings.
Australian technical guidance states that sidelaps should be stitched at midspan when roof spans exceed 900 mm and wall spans exceed 1200 mm (Stramit corrugated roof and wall cladding guidance). Treat those figures as a detailing trigger, not an invitation to guess the rest of the layout. The approved profile instructions and wind design still control the complete fixing arrangement.
Work in a direction that lets the crew see and maintain the active lap. Don't stack panels across access paths or leave them exposed where handling will mark the finish. Keep protective films, where supplied, under control so they don't bake onto the surface or trap contamination.
Clean the wall every day
Swarf, cuttings and stray fixings are a common source of avoidable damage. Metal particles left on a wall or roof can rust and stain the finished surface, while debris caught around flashings can obstruct water paths. Australian product guidance directs crews to clean the work area after each day's installation and remove debris.
Give cleanup a defined place in the programme. Use suitable soft tools and inspect ledges, gutters, laps, sill zones and the ground at the base of the wall. A five-minute sweep is cheaper than explaining rust spots during handover.
A tidy work face is easier to inspect, safer to handle and less likely to hide the defect that matters.
Cavities, Membranes, and Flashings That Keep Walls Dry
A standard cladding detail can keep rain off the visible face while still allowing moisture to build behind it. The difference between a merely covered wall and a durable wall is the planned relationship between the membrane, cavity, closers, flashings and drainage openings.
Australian guidance for cladding systems stresses a vapour-permeable membrane, a minimum 9 mm cavity and vented cavity closers. The closer should restrict ember and pest entry while preserving drainage and vapour movement (YourHome cladding systems guidance). Those elements become more important on broad warehouse and industrial walls, where temperature changes affect large areas of metal and concealed moisture has more opportunity to spread.
Compare the two common approaches
| Visible-first detailing | Moisture-managed detailing |
|---|---|
| Focuses on straight panels and neat joints | Starts with the complete wall build-up |
| Treats the cavity as leftover space | Provides a minimum cavity and a clear drainage route |
| Adds sealant when a junction looks exposed | Uses membranes, flashings and overlaps to manage water systematically |
| Relies on closed edges | Uses vented closers that balance protection with drying |
| Inspects the outside face only | Checks the outer face and the concealed drainage components |
The visible-first approach can be faster during installation, particularly on a simple elevation. It becomes expensive when a leak investigation finds that the membrane is discontinuous or a cavity opening has been blocked. Sealant may hide a junction for a period, but it can't replace a correctly directed water path.
Keep air, water and vapour moving in the right places
Install the vapour-permeable membrane continuously across the wall, with laps and penetrations detailed so water is directed outward. The cavity battens need to maintain the intended separation rather than closing against the substrate. At the base and around openings, vented closers and weep details should remain clear after the panels are fixed.
Flashings shouldn't be selected in isolation. A sill flashing needs to discharge onto the outer layer, a head flashing needs to stop water entering the opening, and corner or parapet details need to coordinate with both membrane and panel laps. If one element ends behind the wrong layer, the wall can send water into the cavity instead of out of it.
For a useful comparison of junction details, review commercial roof flashing types. The same principle applies to wall cladding: a flashing works as part of a drainage sequence, not as a strip of metal added after the panels look complete.
Audit a finished wall from the bottom up
Start at the base and ask where water exits. Then inspect corners, window or door heads, sills, parapets, penetrations and changes in material. Look for compressed cavity openings, punctured membranes, unsealed transitions and fixings that have restricted the cladding's ability to move.
Don't fill every visible gap with sealant. An opening may be intentional ventilation or drainage. Confirm its purpose before closing it, and ensure pest and ember protection doesn't turn into a moisture trap. On thermally variable Sydney facades, keeping the cavity dry is usually more valuable than making every edge appear sealed.
Inspection, Maintenance, and Long-Term Cladding Performance
A facade can look complete while a hidden defect is already restricting drainage, exposing the coating or admitting water behind the wall system. Inspection should therefore begin at handover and continue after severe weather, nearby construction, or work by other trades. Signs, lights, conduits and equipment can all disturb otherwise sound cladding details.
Walk the elevation methodically. Check corners, lower edges, penetrations, flashings, sealant joints and junctions with other materials. A fresh stain below a junction needs investigation even when the panel has no visible dent.
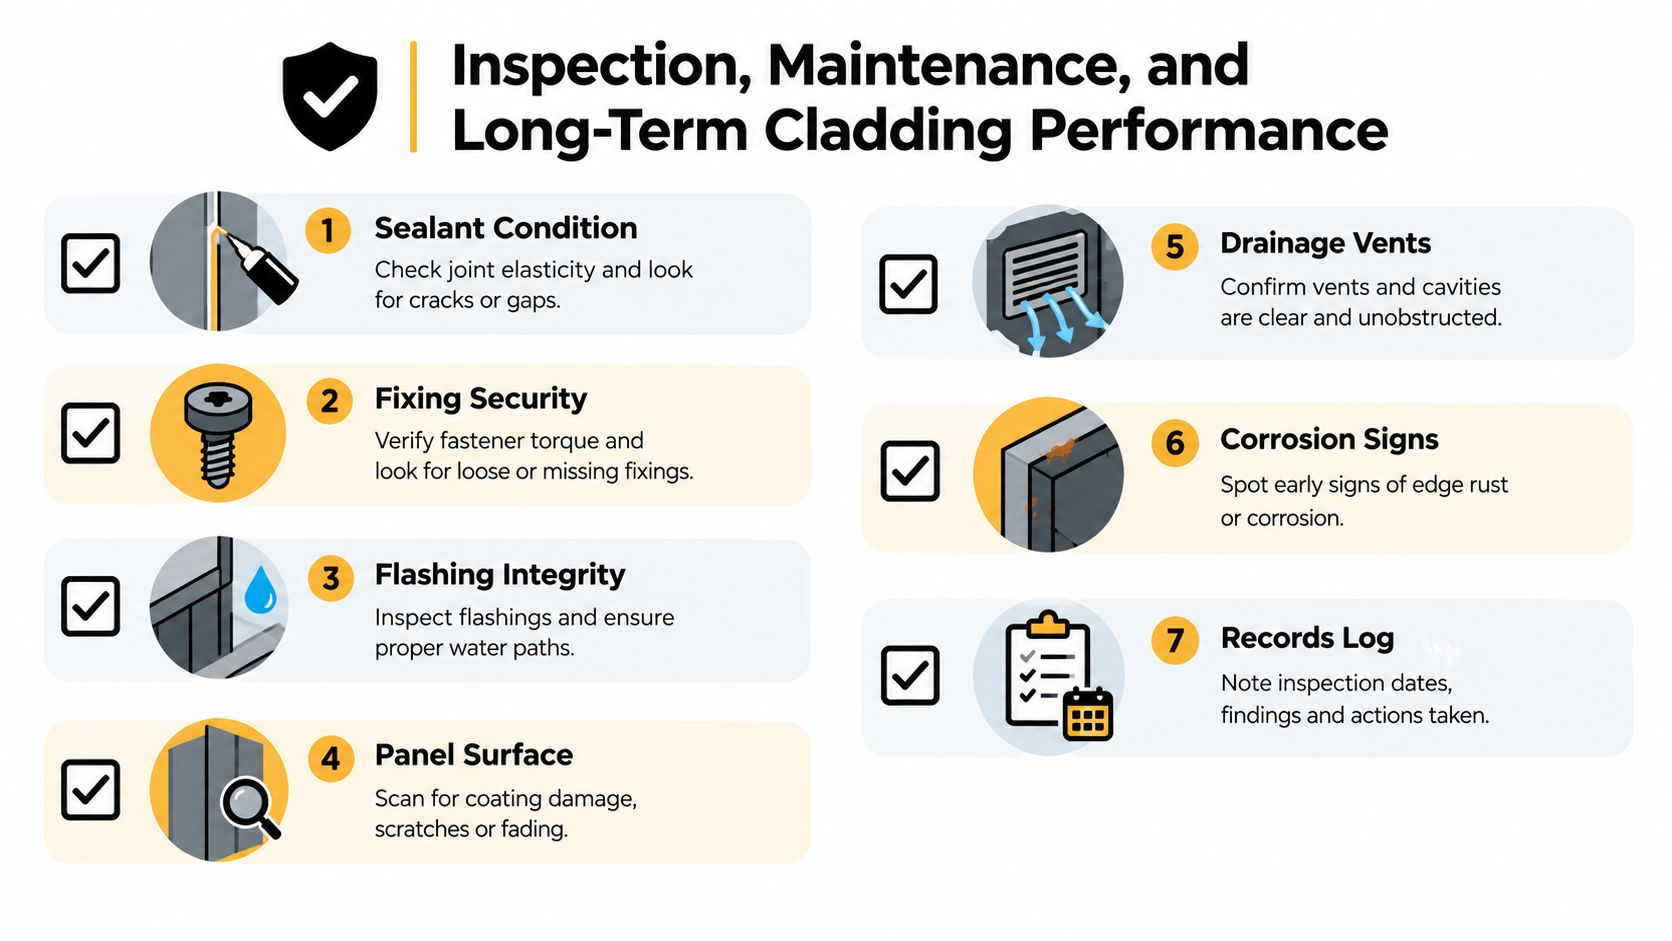
Use a practical inspection checklist
- Sealant condition: Look for splits, debonding and hardened joints around penetrations and transitions.
- Fixing security: Check for loose, tilted or overdriven screws, plus washers that no longer seat correctly.
- Flashing integrity: Trace each water path and confirm that laps, returns and discharge points remain open.
- Panel surface: Record scratches, dents, coating damage and staining before anyone covers them.
- Drainage vents: Check cavity openings, closers and weep routes for debris or obstruction from later work.
- Corrosion signs: Inspect cut edges, swarf marks, laps and damp ledges closely.
- Records log: Record the inspection date, weather event, location and action taken. Repeated defects often reveal a shared installation or drainage fault.
A site supervisor or facilities team can handle visible checks where access is safe. Use a qualified cladding or roofing specialist when water enters the building, staining returns, corrosion spreads, fixings fail, or the suspected defect is inside a sealed cavity. Those conditions require investigation behind the visible sheet, not another bead of sealant.
Treat small marks as information
A rust-coloured line may be swarf, or it may show a wet ledge or damaged cut edge. Paint wear around a fastener can indicate movement or incorrect installation. Condensation inside the building may come from the wall build-up rather than a hole in the outer sheet.
COLORBOND® steel has been used in Australia since 1966, giving owners a long record of how the product performs in common cladding conditions. That record is useful when recurring patterns become documented checks, such as the same stain below a flashing, repeated swarf at a lap, or corrosion returning at one cut edge.
Keep inspection records with product schedules, photographs, handover documents and repair notes. Record the defect location, likely cause, temporary action and final repair. This makes it easier for an owner or strata manager to distinguish a local fault from a systemic cavity problem or damage caused by later trade work.
Planning a Commercial Cladding Project the Right Way
Good planning makes the facade easier to build and easier to defend. Treat cladding as a complete wall system, not a colour selection followed by a sheet order. Before approving work, confirm the substrate, coating, fasteners, wind requirements, cavity, membrane, flashings, movement allowances and inspection access.
Use these decision points during procurement and site meetings:
- Specify the complete material system: Record the required steel grade, coating, profile and fastener class instead of accepting an unnamed equivalent.
- Resolve movement before fabrication: Large wall areas need a fixing and joint strategy that accommodates thermal action and building movement.
- Confirm cavity drainage: Require the membrane, cavity, closers and weep details to appear in the drawings, not just in a verbal instruction.
- Plan the cleaning hold point: Make daily swarf removal and final debris inspection part of the quality checklist.
- Request evidence: Keep delivery records, product documentation, fixing schedules, photographs and inspection reports with the project file.
A quote that covers only panels and labour isn't comparable with one that includes flashings, cavity components, access equipment, cleanup, testing and documentation. Ask who coordinates with the builder, engineer, certifier, insurer or strata manager when an existing wall needs investigation.
If you're comparing protective finishes for other industrial assets, information about durable ceramic coatings for auto illustrates why coating selection should follow the exposure and substrate, not just the desired appearance. The same reasoning applies to architectural metalwork, although COLORBOND® cladding still requires its own approved product and installation requirements.
For Sydney-specific planning, cladding installation in Sydney is a useful starting point when assessing access, sequencing and the coordination required on an occupied commercial site. Commercial Roofers offers inspections, reporting, repairs, replacements and commercial cladding installation, including longline and other metal cladding systems, with project planning suited to warehouses, factories, retail properties and strata buildings.
The practical test is simple. Once the facade is closed, can the wall move, drain, dry and be inspected without destructive work? If the answer isn't clear, resolve the detail before the first sheet is fixed.
Commercial Roofers offers commercial cladding installation, detailed roof and facade inspections, flashing and drainage repairs, and project coordination for Sydney and NSW properties. Visit Commercial Roofers to arrange a site assessment and discuss a compliant cladding solution that remains serviceable after handover.